
Assembling and maintaining a sample cylinder is easy. Just screw in the valves and use, right? Well getting the results you want consistently throughout the life of the sample cylinder requires a little more thought. Let's discuss.
First. Why is this important?
At SilcoTek we coat thousands of sample cylinders and valves a year with our inert CVD coatings. We know that for the customer to get the most out of their sample system, they not only need a high durability inert coating. Customers also need to understand that proper component selection, careful assembly, and periodic maintenance of sample cylinders can mean the difference between getting reliable results efficiently and disaster. Nobody wants a sample cylinder failure and they don't want to keep taking samples because of test failures. That's why taking a few simple steps before and after use make all the difference.
|
In this blog post you will learn.
- Tips on selecting the right sample cylinder and valve for your application
- Sample cylinder assembly guidelines
- Things to look for when inspecting a sample cylinder to assure safe and reliable analytical results
- Sample cylinder care and maintenance tips
|

1. Selecting the right components.
- Do you need a constant pressure or constant volume sample cylinder? If you're concerned about the phase change of the sample liquid, you may want to consider using a constant pressure sample cylinder. They're more expensive, but you're assured of measuring the process fluid under the right conditions.
- Do you need a dip tube? A dip (or outage tube) are used to preserve some vapor space above liquefied gases. The dip tube allows only partial filling of the sample cylinder so the remaining vapor space can take up expansion of the liquid when the sample cylinder is exposed to higher temperatures. That helps to maintain cylinder pressure and avoid over pressurizing the sample cylinder. Here's a good explanation on how to calculate the desired vapor space in the sample cylinder from Tom Bloom at Restek® Corp.
- Dip tube length = % outage x cylinder length, i.e. a 50% outage on a 10in sample cylinder (.5x10) equals a dip tube length of 5in. (note this is an approximate calculation, consult the sample cylinder manufacturer for recommended length for their specific sample cylinder).
- Select for the right pressure and environment. Select valve and sample cylinders that are pressure rated to exceed the expected pressure of the sample stream. Do not exceed the rated pressure of the cylinder or valve. Note that most cylinders are rated at an ambient temperature of around 100°c. If the sample environment exceeds the rated temperature contact the sample cylinder and valve manufacturer to be sure the cylinder and valve pressure capabilities will not be exceeded.
Need help finding the right coated sample cylinder or valve? You can find manufacturers that offer inert coated sample cylinders, valves, fittings, filters and regulators on our Buy Coated Products Page.

2. Selecting the valve.
- Do you need a ball valve or needle valve? Do you need fine control of the sample cylinder flow? Go with the needle valve. Does the valve have a burst disk to prevent sample cylinder failure. How durable is the valve? Will the valve be "cranked closed" in the field with a wrench? That will surely ruin the seat, so consider using a high durability sample cylinder valve with design features that prevent over tightening.
- There are many high quality sample cylinder valve manufacturers out there. It's a good idea to look within your field of use to find what combination of cylinders and valves work for your application. Consult others in your field and trade papers to get recommendations.
- Do you need a filter? To avoid particulate contamination it's a good idea to install a sintered metal frit filter upstream of the sample cylinder.
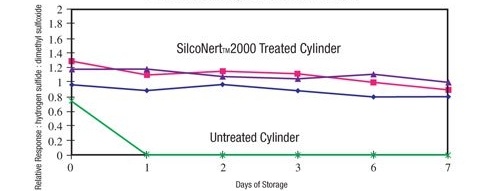
- Be sure to coat the filter and sample cylinder with SilcoNert® or Dursan® to prevent active sites in the filter from adsorbing or reacting with the sample stream. For example sulfur is readily adsorbed by an uncoated sample cylinder when briefly exposed to the flow path, drastically affecting sample storage.
3. Assembling the sample cylinder and valve
- Inspect sample cylinder and valve for damage, especially on the threads. Check for burrs, gouges or nicks, crossed thread damage, galling damage and damage to the valve seat. If you're using a relief valve, be sure there is no sign of damage to the relief valve or burst disk. Repair any damage and thoroughly clean threads before assembly. Inspect the inside shoulder of the sample cylinder for corrosion and particulate matter.
- Clean the sample cylinder and valve before assembly. Clean for oxygen service or better, if using for analytical or sampling for sulfur or other reactive gases. Be sure the solvent used for cleaning will not leave a residue. Here are some tips for cleaning SilcoTek® coated sample cylinders and valves:
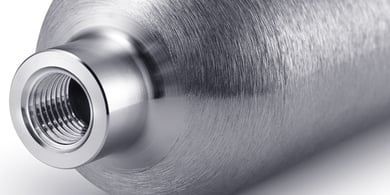
- When cleaning a coated part, rinse with a high purity solvent that will dissolve surface contaminants.
- Use a nonpolar solvent, like pentane or hexane, to remove hydrocarbon contaminants; or use a more polar solvent, like acetone, to remove more active contaminants.
- Avoid using cleaners containing abrasives. Abrasives can scratch the coating surface.
- Mild sonication may assist in contaminant removal. Do not sonicate the surface for more than 1 minute.
- Solids can be removed with a soft nylon bristle brush, using light pressure.
- Do not use basic solutions or soaps with a pH greater than 8.0.
- Do not steam clean SilcoTek coated surfaces; this can damage the layer.
- For high purity applications, SilcoTek recommends the cleaned surface be tested to confirm trace cleaning solvents are completely removed and surface activity is not compromised.
- Do not steam clean surfaces. Process steam can damage the coating surface and introduce reactive particulates into the sample cylinder.
- After cleaning apply PTFE tape to valve threads. To assure a leak tight seal, wrap the threads 3 times with a high quality PTFE tape. Leave the first threads exposed to assure positive thread engagement.
- Engage threads manually (2-3 turns by hand). Threads should engage easily and smoothly. If threads do not engage smoothly, check again for damage or burrs. Never force threads.
- Tighten valves using a torque wrench. Torque to manufacturers specifications (usually a maximum of 8 to 10 ft-lbs). Threads should engage another 2-3 turns. Clamp cylinder assembly prior to torquing valves to facilitate the assembly process. Protect the cylinder from damage, scratches or gouging. Gouging the cylinder may compromise the pressure rating of the sample cylinder.
4. Keeping your sample cylinder fit.
Develop a sample cylinder inspection plan and keep an inspection calendar to be sure sample cylinders and valves are periodically inspected. Inspection tips include:
- Periodic inspection
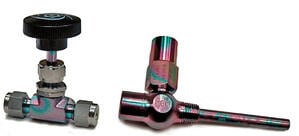
- Inspect for particulates
- Check for damage to cylinder, valve or burst disk.
- Inspect for corrosion
- Inspect threads for damage and fouling
- Check for signs of leaks
For SilcoNert and Dursan coated cylinders, layer appearance and surface finish can vary from lot to lot. Small variations in surface thickness (measured in angstroms) can impact layer appearance. The surface finish should be bright and free of defects, but original surface condition can have a major impact on final surface quality.
5. About Thread Galling
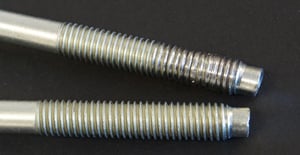 Galling can occur when two parts of similar material are connected under compression and the heat generated "cold welds" the parts together. Galling can occur when threading valves into stainless steel sample cylinders. Also galling can occur when two SilcoTek® treated threads, compression fittings or NPT fittings are assembled. Be sure to apply PTFE tape to valve threads when assembling sample cylinders.
If both mating parts must be coated, then SilcoTek recommends using anti Seize compounds made from Silver, Moly or Nickel: For sample cylinder applications refer to the instructions pertaining to the use of Teflon tape on the valve NPT prior to installation. Want to learn more about thread galling? Here's a thorough article on galling from Machine Design.
6. Treatment Layer Troubleshooting
Under normal use, your treated items should deliver outstanding performance for years to come. However; sample cylinder effective lifetime is dependent on the severity of the environment. Factors that can impede performance are:
- Contamination: Failure to properly clean the surface can allow increased surface activity. If performance changes, thoroughly clean the surface and inspect the layer for damage.
- Erosion: Contact with abrasives can accelerate surface wear.
- Bases: Contact with a base (pH 8 or higher) can accelerate deterioration of the layer (Silco-coatings only).
- Surface finish: Surface finish and color should stay consistent throughout the life of the product.
- Changes in the finish or color may indicate a partial loss of the layer. To prevent further loss, ensure no exposure to bases or abrasives.
- Abuse. Damage to the sample cylinder or valve may require replacement.
What's the benefit of coating sample cylinders?
Even under extreme pressure and temperature, SilcoTek® coatings significantly improve performance. Coating benefits include:
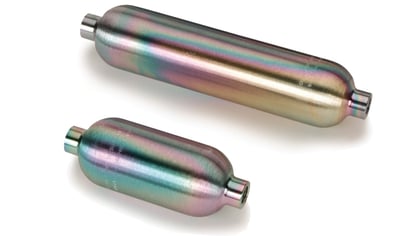
- Improve sample cylinder durability and corrosion resistance
- Better sulfur detection to prevent refining catalyst damage, sample low level sulfur contamination
- Eliminate permeability and porosity issues associated with PTFE
- Accurate grading of refining & process feedstock.
- Store oil and gas samples for long periods without risk of sample loss.
- Eliminate false or erroneous readings
- Accurate downhole sampling with fast response.
Get more benefits! Go to our Sample Transfer Solutions page to learn how to improve your process through better sampling. Or get sample transport tips from industry leaders.


